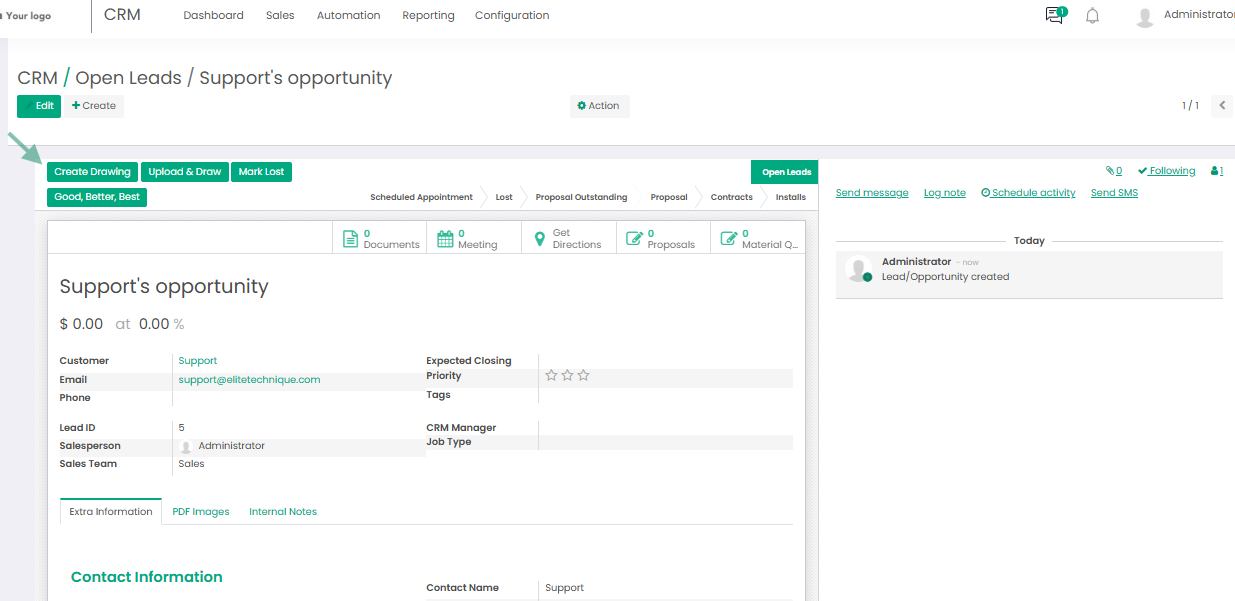
1. Create Drawing Directly from Leads
Users can now start the fence drawing process directly from a Lead, making it easier to move from a potential customer to a completed fence design. Once the drawing is completed and saved, the system automatically converts the Lead into an Opportunity and continues with the existing workflow. This simplifies the process by removing the need to manually convert Leads before creating a fence drawing.
How to Use
1.Open the CRM Dashboard or Command Centre.
2. Click Create to create a new Lead.
3. Open the newly created Lead and click Create Drawing.
4. Use the Drawing Tool to draw the fence design.
5. Once the drawing is completed, save the drawing.
The system will automatically convert the Lead into an Opportunity and create a new Contact, then continue with the existing workflow
2. Update Margin
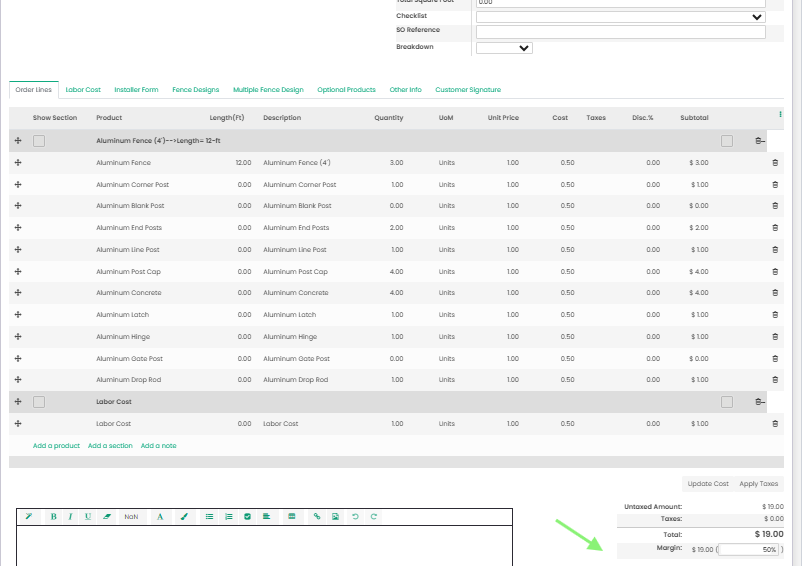
Users can now adjust the target margin directly from a proposal, making it easier to quickly achieve the desired profitability on a sale. When Edit Margin on the Proposal is enabled in Sales Settings, the Margin % field becomes editable, and the system automatically recalculates the selling price based on the target margin while keeping the product cost unchanged.
For proposals with multiple lines, the system automatically adjusts the selling prices proportionally across all lines while keeping the existing costs, quantities, and discounts unchanged. Totals are recalculated automatically, just as they would be when manually updating a selling price.
How to Use Update Margin
- Go to Sales Settings and enable Edit Margin on the Proposal.
- Open or create a Proposal and add the required products or services.
- In the proposal, locate the Margin % field.
- Enter the desired target margin percentage.
- The system will automatically recalculate the selling price to achieve the target margin while keeping the cost unchanged.
- For proposals with multiple lines, the system automatically adjusts the line prices proportionally and recalculates the proposal totals.
- Once the proposal is confirmed as a Contract Order, the Margin % field will no longer be editable.
3. Automatic Product Cost Update from Proposal
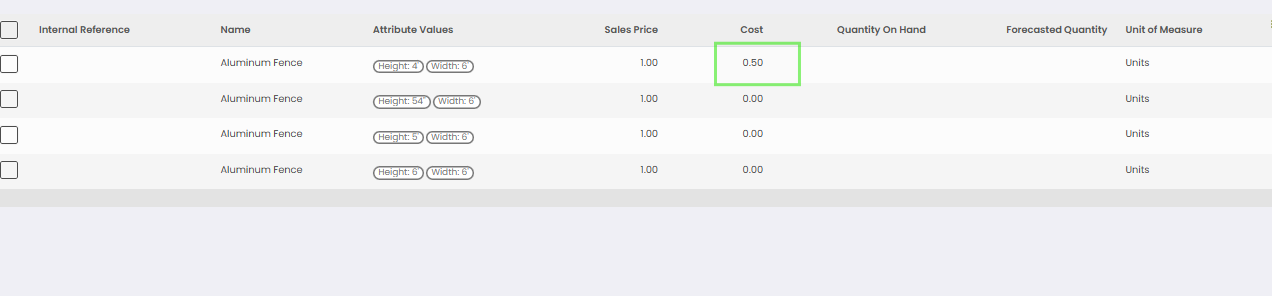
Managing product costs is now easier directly from the Sales Order. The Cost column is available by default, allowing users to quickly review and adjust material costs while working on an order. When a cost is changed, the updated value is automatically applied to the product, keeping the product's standard cost up to date.
The new Update Cost button provides additional visibility and control, allowing users to review the previous and updated costs, make any necessary adjustments, and confirm the changes. This makes it easier to keep product costs accurate while working directly from the Sales Order.
How to Use Automatic Product Cost Updates
- Open a Sales Order and add the required products.
- Review the Cost column, which is displayed by default on the order lines.
- Update the Cost of a material product directly on the order line.
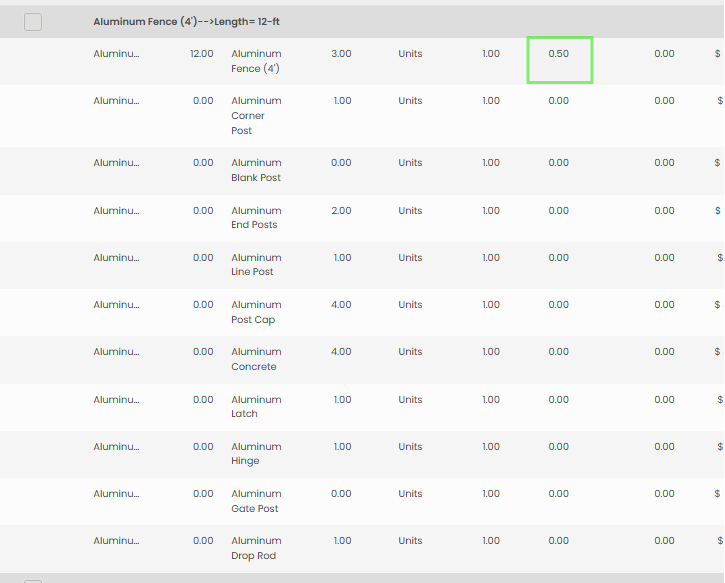
- Click Update Cost at the bottom of the screen next to the total section. The old cost and new cost will be displayed in a pop up window. Review the changes, then click Save to apply the update.
Please note that the costs cannot be edited directly in the pop-up window. Click Save to apply the updated cost.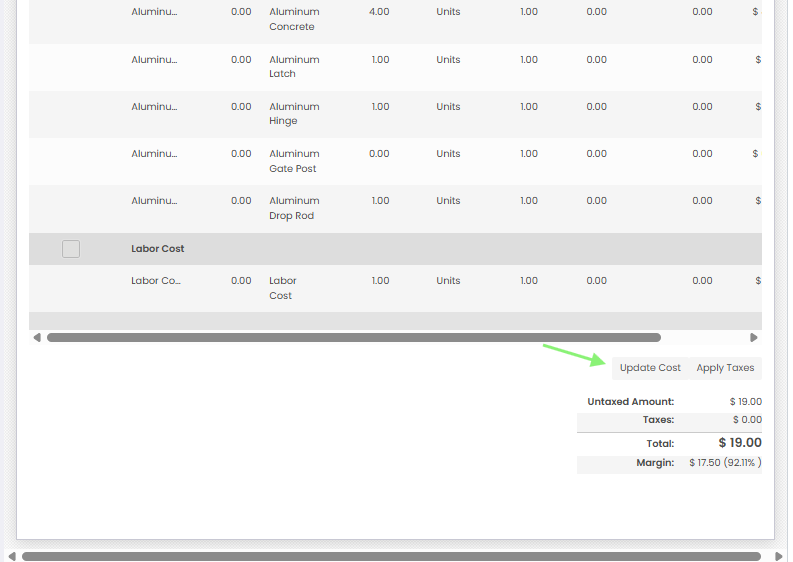
- The new cost is automatically applied to the product's standard cost.